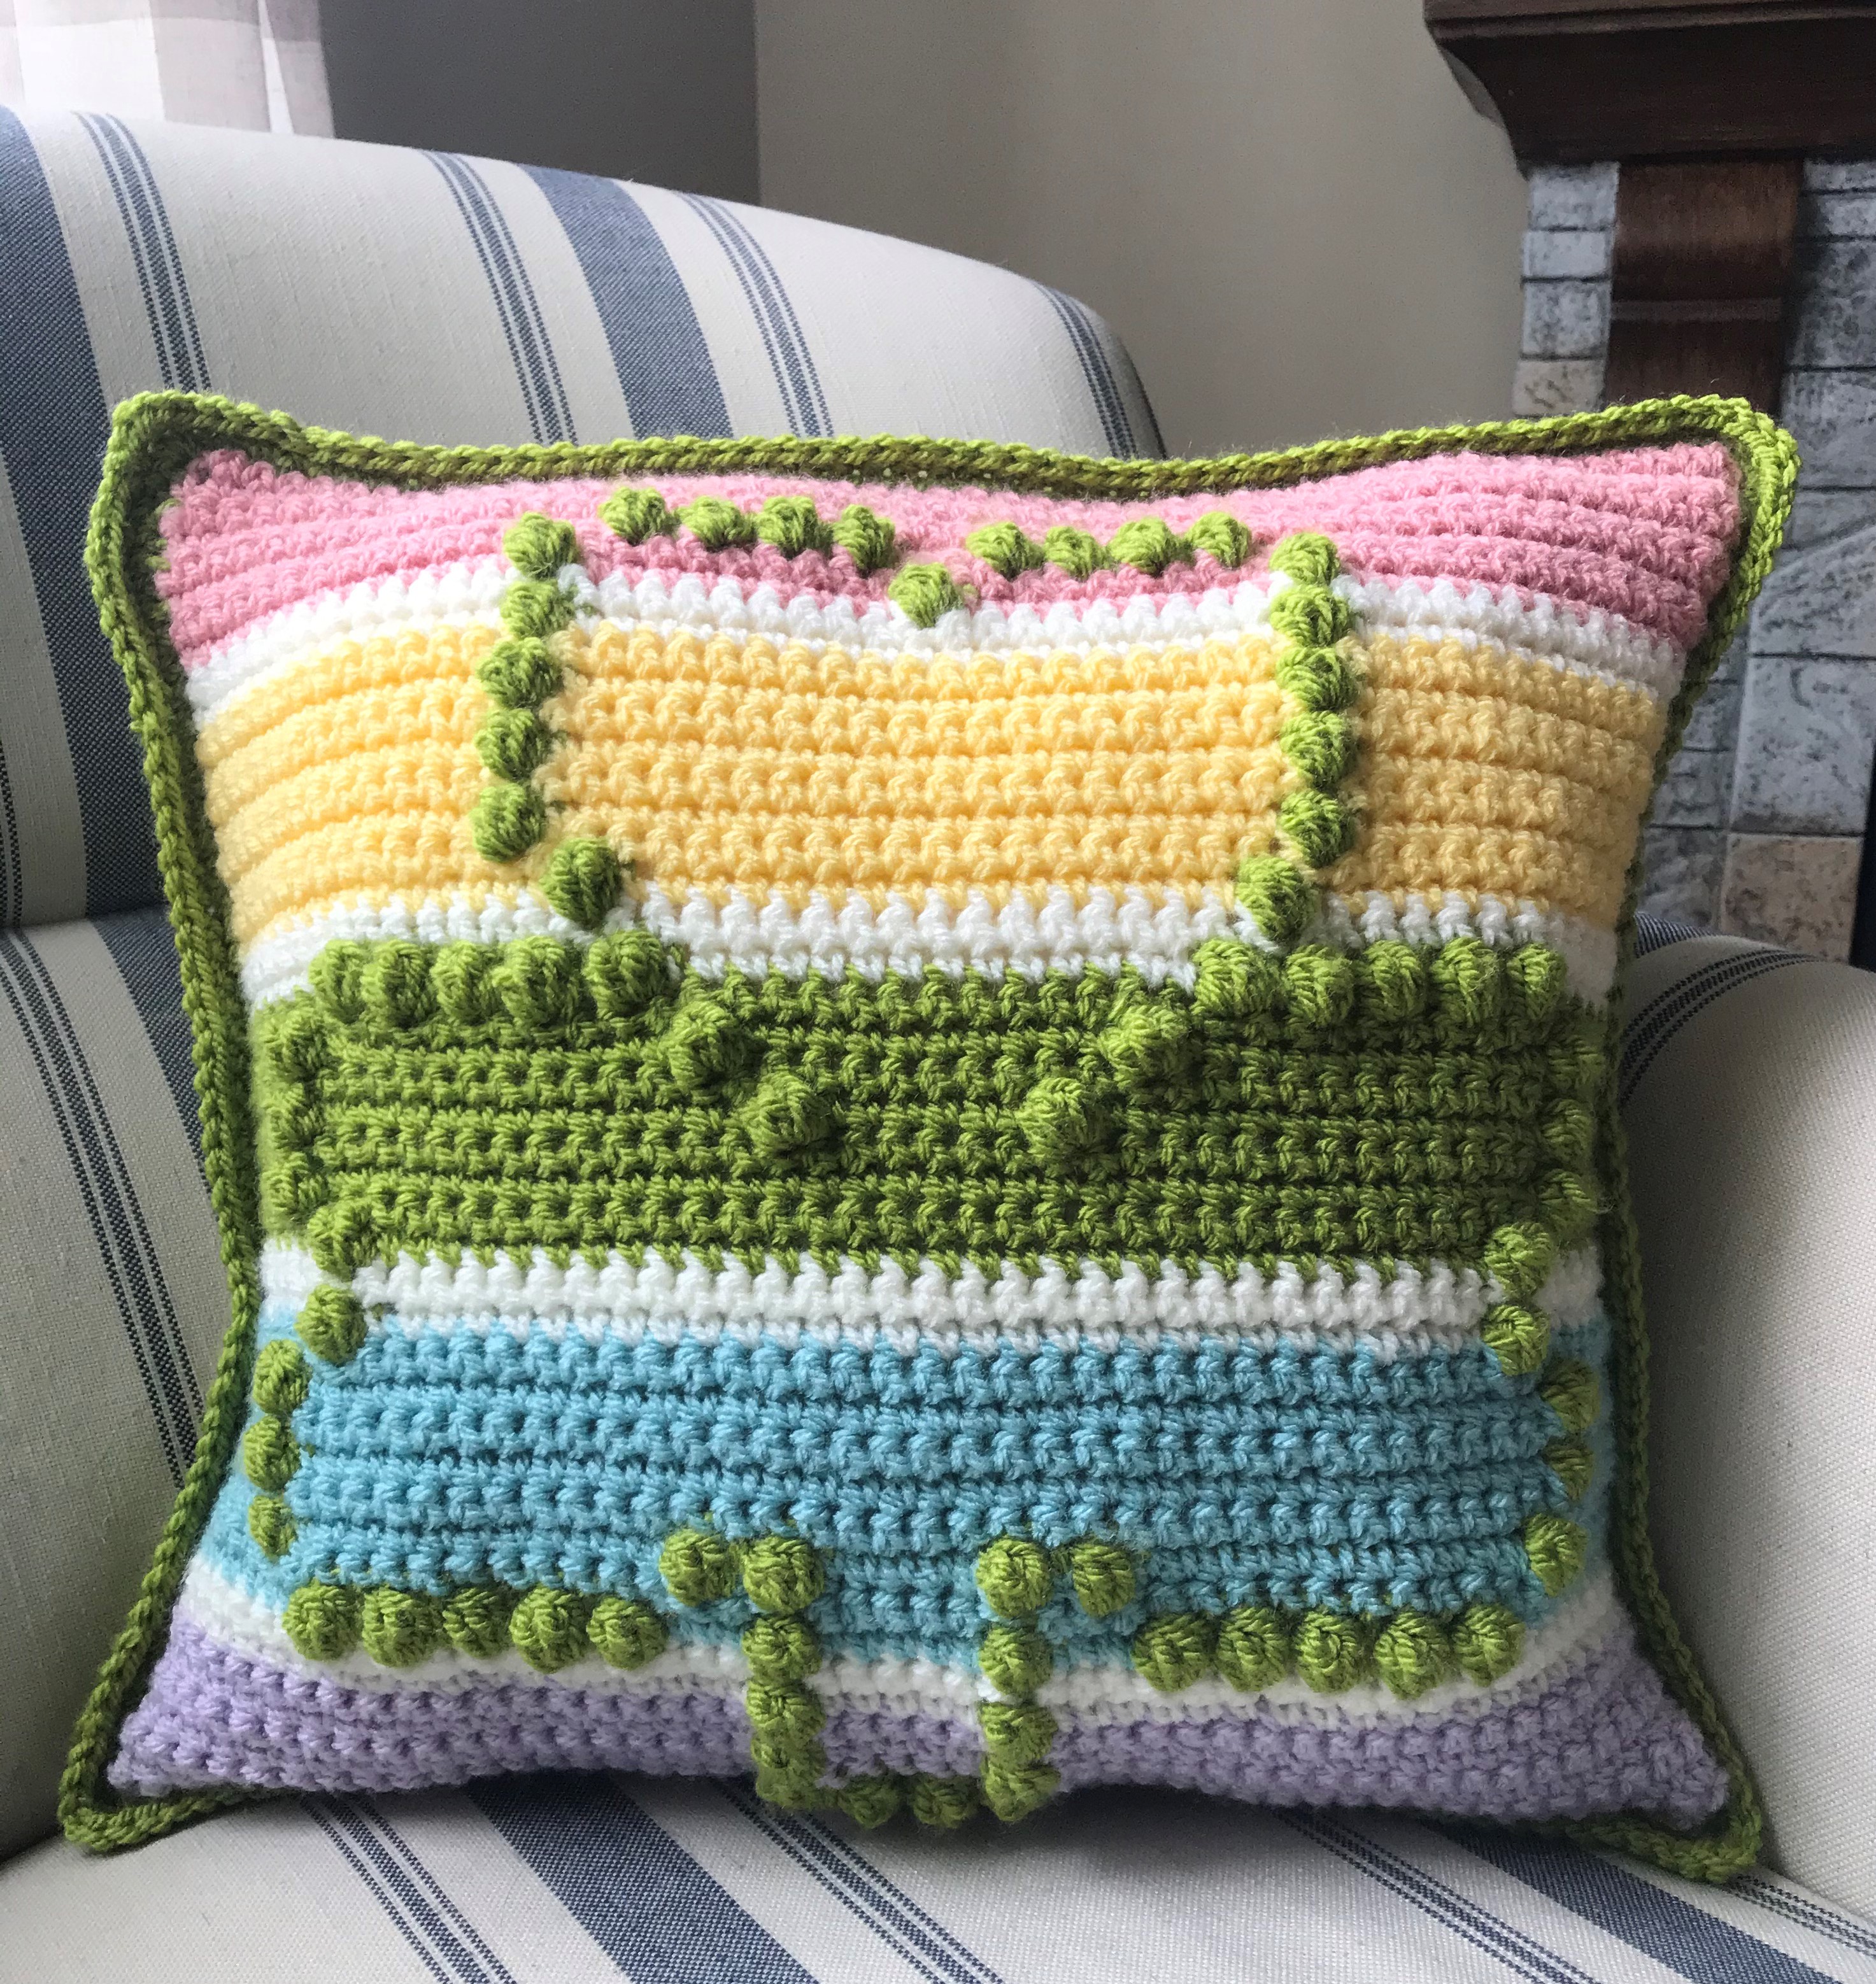
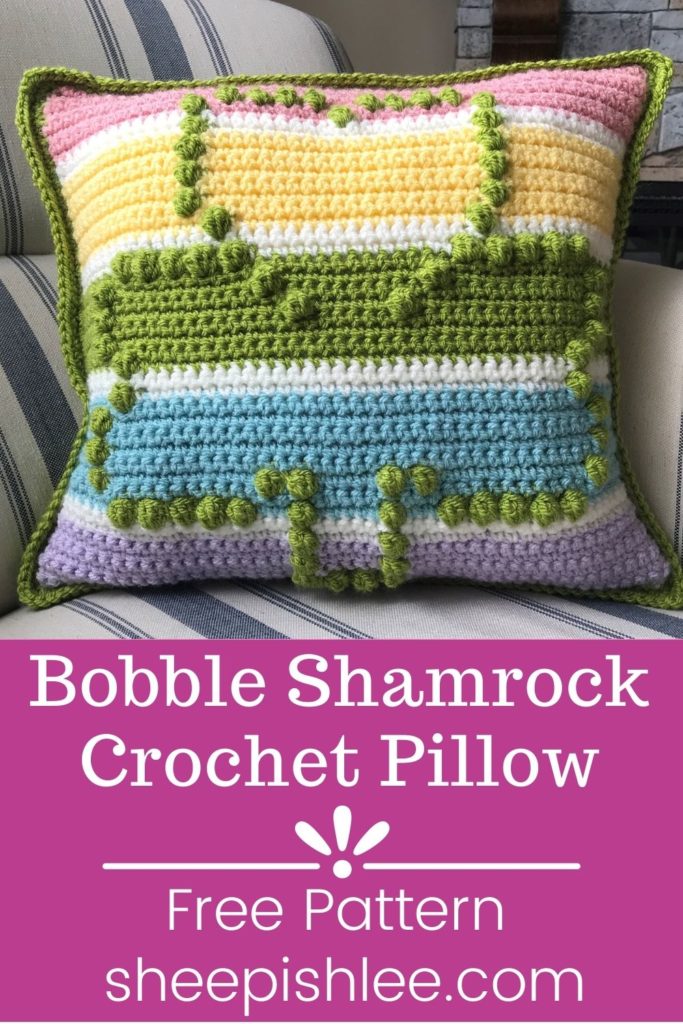
This simple crochet pillow beckons (and welcomes!) spring to come sooner rather than later! With pretty pastel colors and a cute bobble shamrock, it’s the perfect addition to any St. Patrick’s décor. Rainbow lovers will find their pot of gold in the Bobble Shamrock Crochet Pillow since it’s a quick and easy make. Texture combines with color creating a modern addition to your springtime decorating.
Lucky Charms
I love to decorate my house with home décor items that fit the season or holiday. Homewares, little knickknacks and cute whatnot’s just seem to add an extra bit of homey happiness and charm. Blankets, pillows, garlands, wreaths…I could go on. And, on and on…You get the picture, right crafty friends?!😉 I might (okay, to be fully transparent, it’s probably more than just a mere “might”) have a small issue with liking too many things. But, what else is a girl to do when she’s shopping and see’s something that is just so adorably cute it screams, “Take me home with you!”? Lucky for me, I was able to solve my need for having some St. Patrick’s décor by putting my crochet skills to use and creating the Bobble Shamrock Crochet Pillow.
Project & Yarn
When I designed this pillow, I knew I wanted to stretch my wings a bit and try a type of yarn I’ve never used before. For a while now, I’ve had my eye on Paintbox yarns and figured the Bobble Shamrock Crochet Pillow would be the perfect project to try it out on. Equipped with a plethora of colors in its collection, the choices for choosing a colorway from Paintbox are endless. Keeping in theme with St. Patrick’s and the infamous shamrock (along with the notorious leprechaun and rainbow), I wanted to work with colors that would evoke those images. Paintbox did not disappoint! I ultimately chose Paintbox Simply Aran (purchased online from Love Crafts at lovecrafts.com) and was so pleasantly pleased not only with the softness of the yarn (oh-so-squishy) but with the absolute ease it was to work with. I had hoped it would be the type of yarn that would glide on my hook and “Sláinte!” (the Irish equivalent to “Cheers!”), luck was on my side because it did. The ease with which it worked made the whole project that much more enjoyable and for a 100% acrylic, worsted weight yarn, it was a bargain at only $3 a ball. Again, “Sláinte!” to Love Crafts for providing such a wonderful product at such an affordable price. If you have never visited or purchased from Love Crafts before, I would highly recommend it. Paintbox is just one of many, many yarn products they provide in addition to a host of other supplies and inspiration.
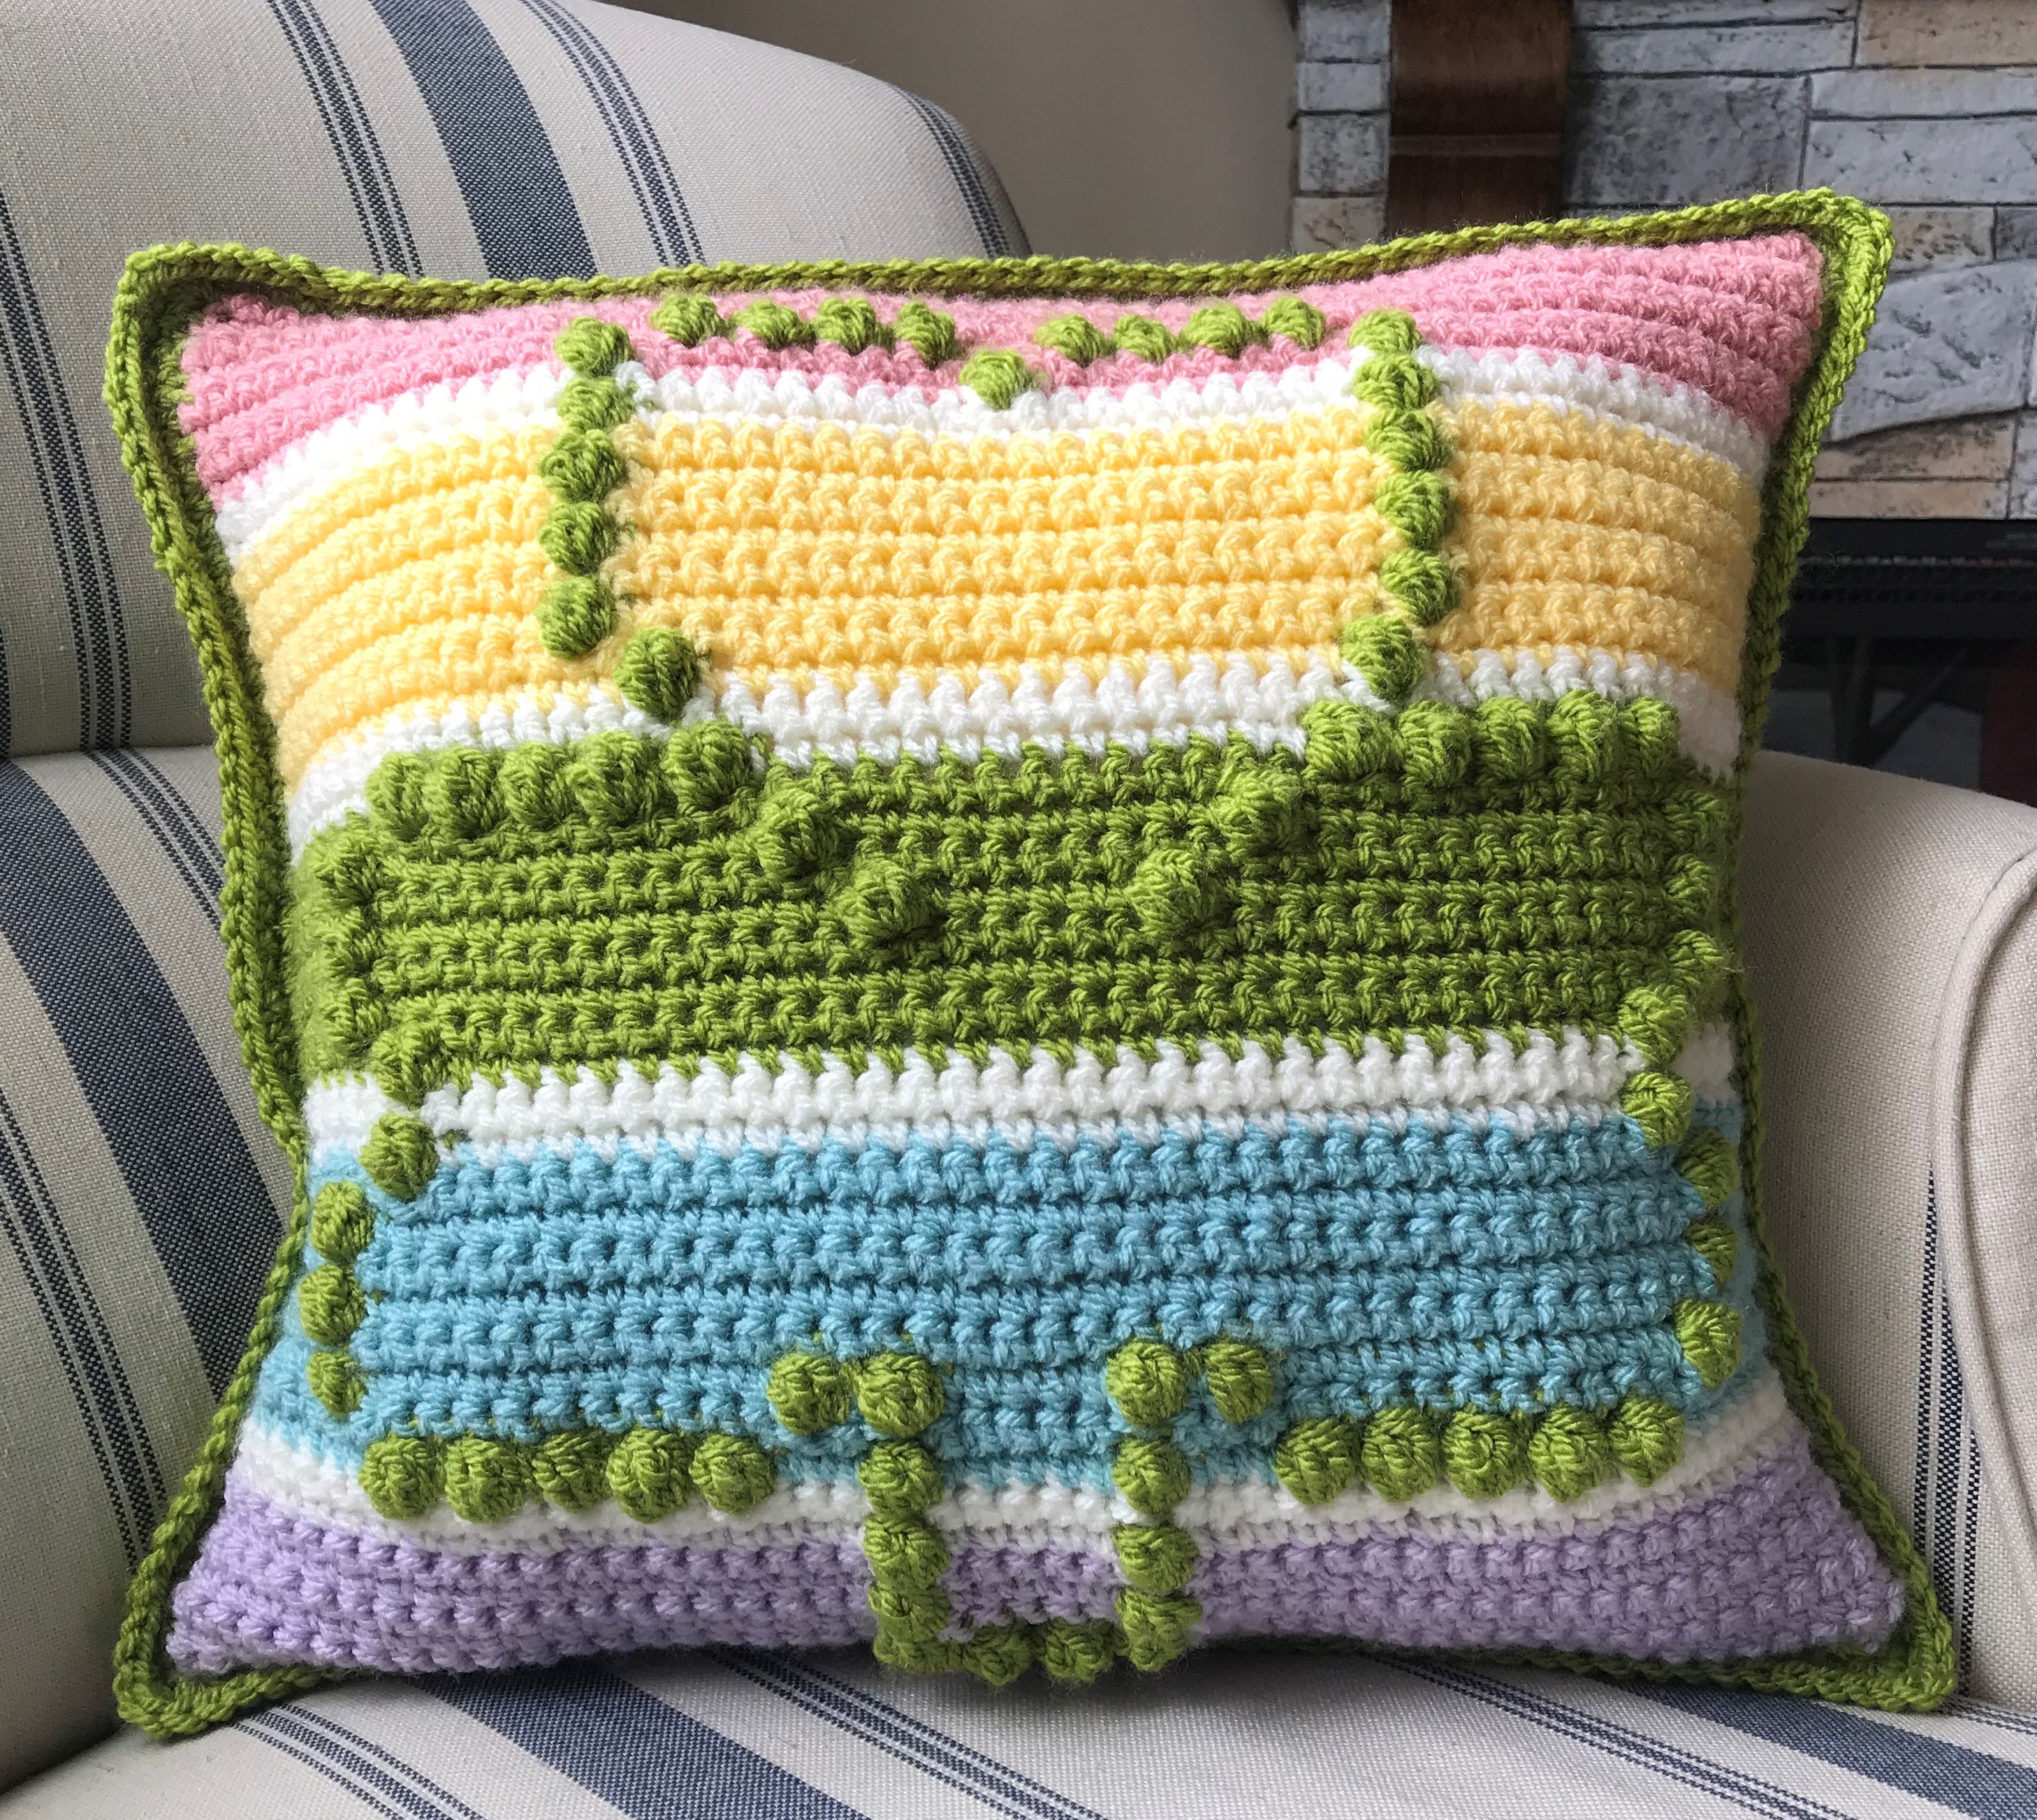
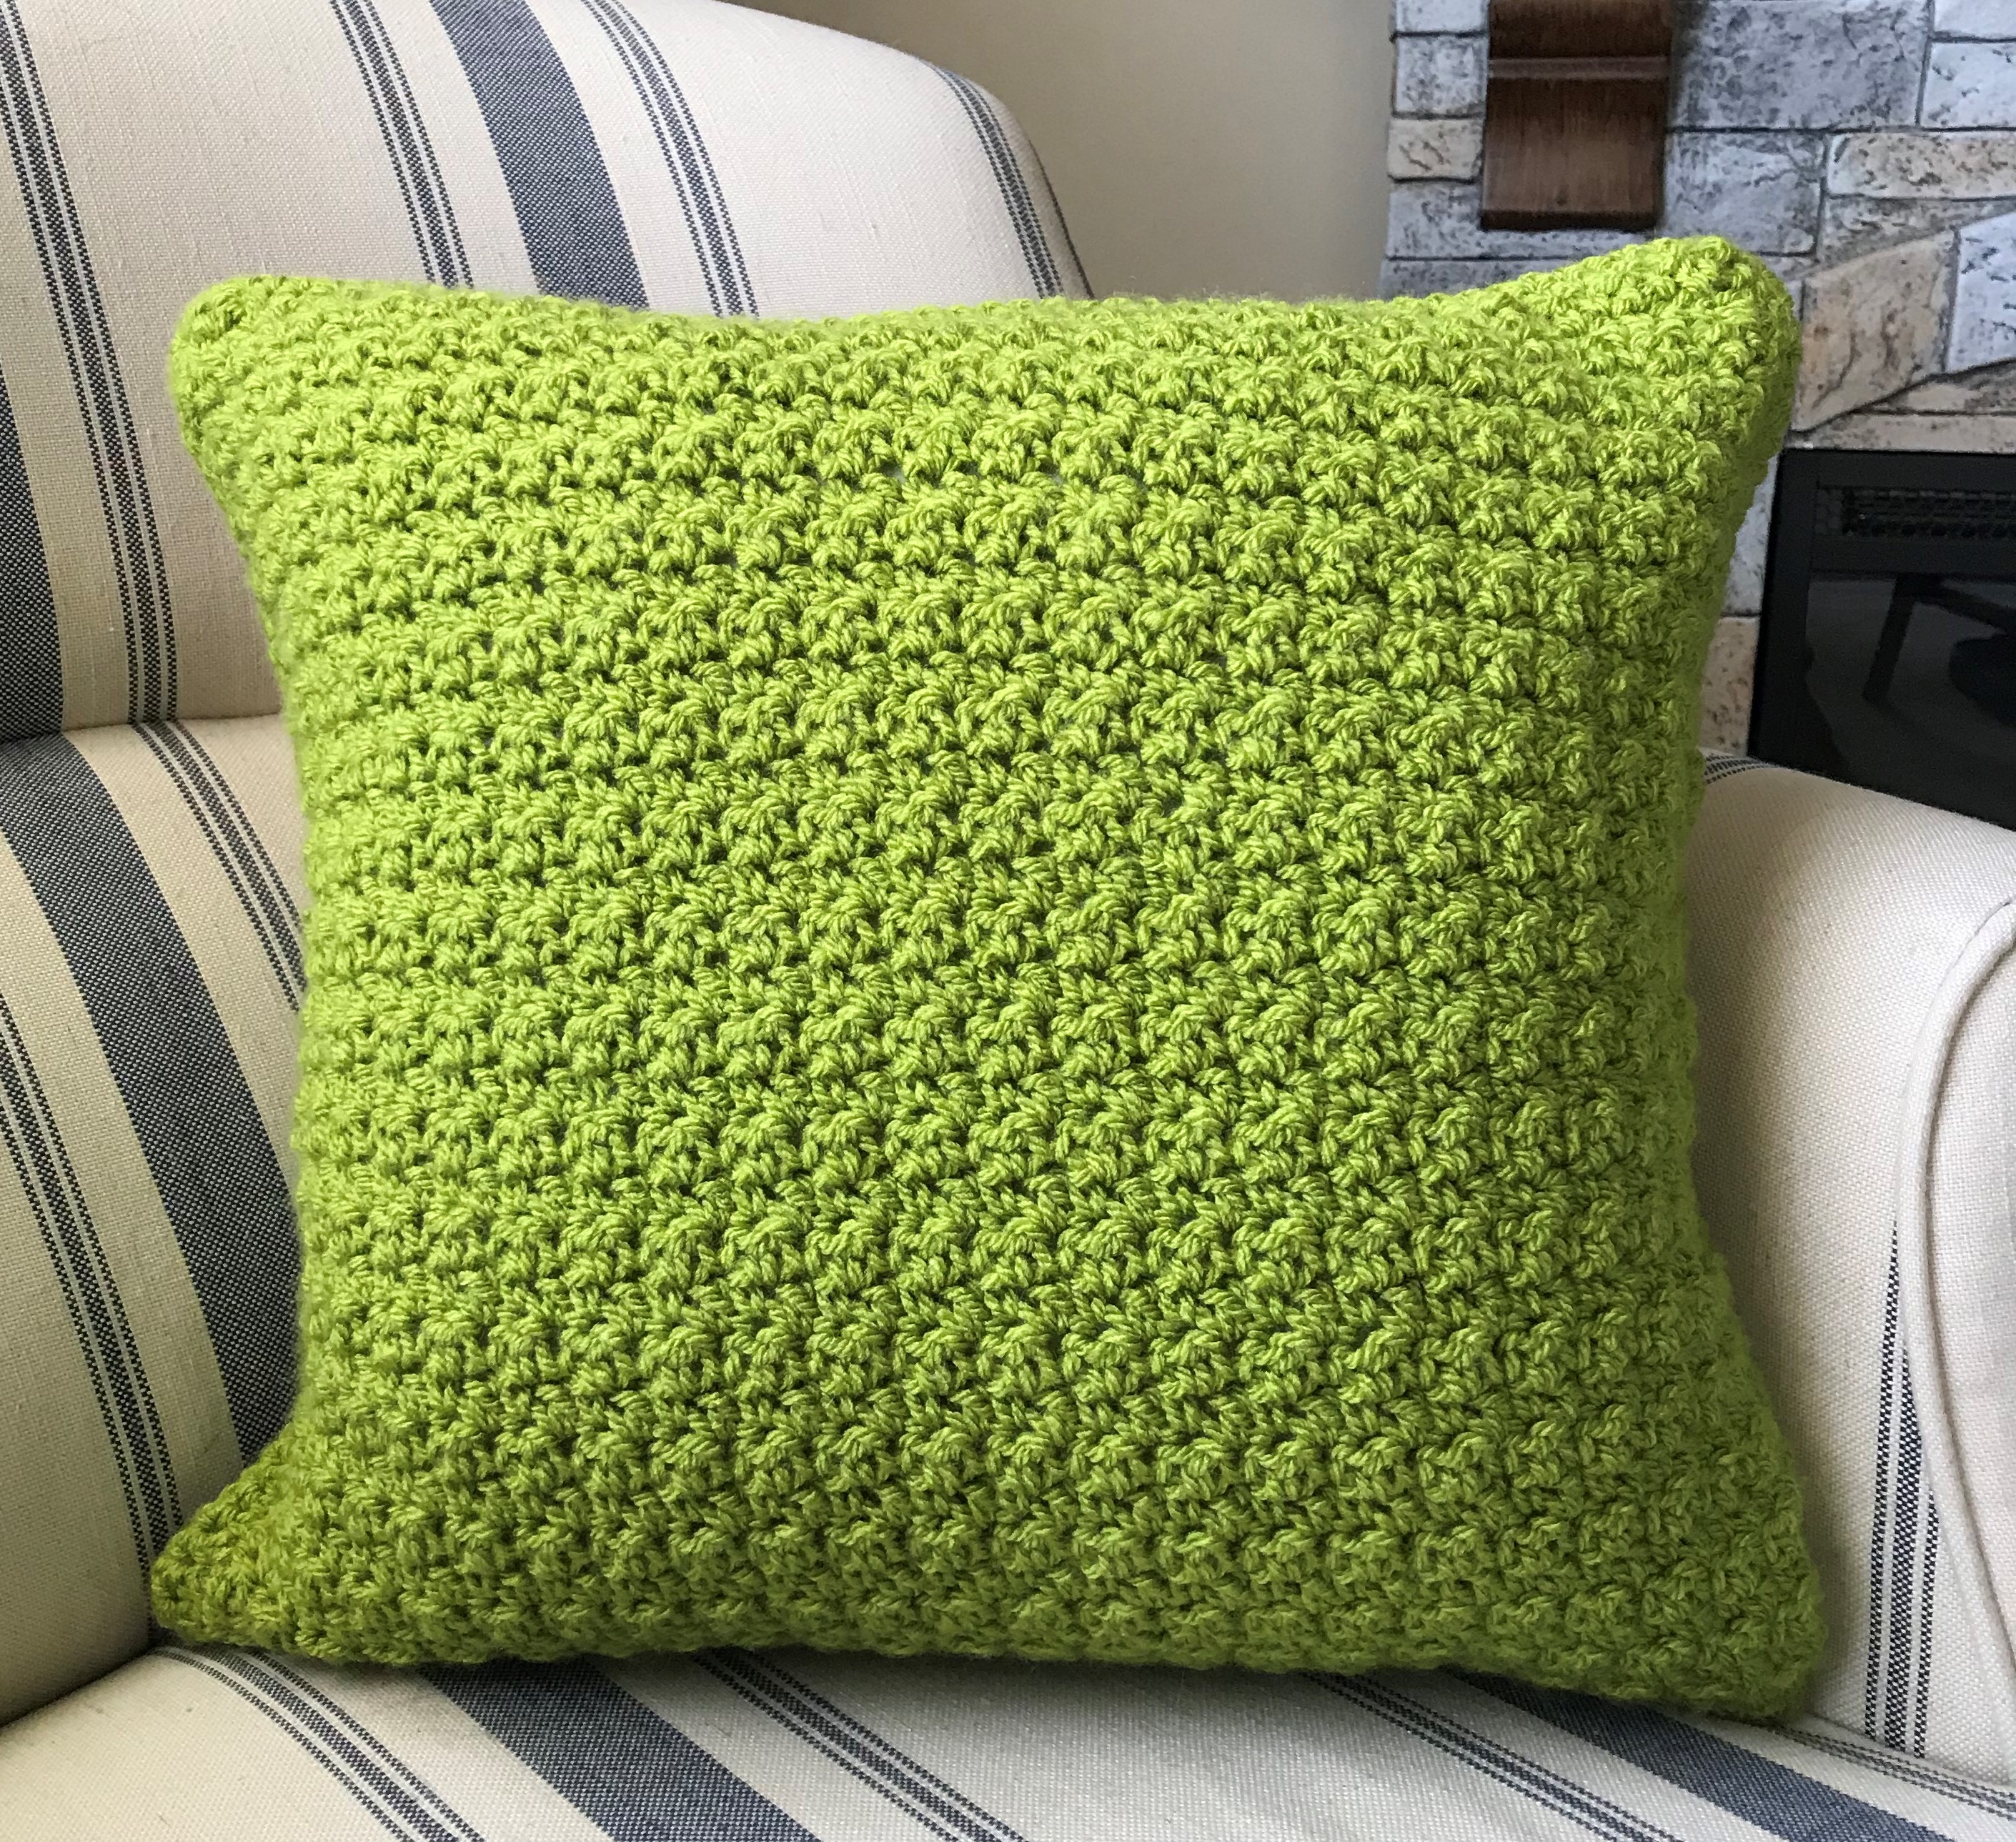
The construction of the Bobble Shamrock Crochet Pillow consists of simply crocheting the front side and back side and then crocheting the two sides together, adding an additional round of single crochet. The front side is worked up in rows of single crochet along with the bobbles which create the outline of the shamrock. For added texture, the back side of the pillow is worked using alternating single and double crochet, often referred to as the lemon peel stitch.
And, that’s all there is to it! If you’re like me and enjoy decorating your home (or office…yes, I do that too!), for the seasons, I hope you’ll give the Bobble Shamrock Crochet Pillow a try.
Keep Crocheting!
Erica
BOBBLE SHAMROCK CROCHET PILLOW
Skill Level: Beginner / Easy +
Materials
* Paintbox Simply Aran – Blush Pink (1 skein)
* Paintbox Simply Aran – Daffodil Yellow (1 skein)
* Paintbox Simply Aran – Lime Green (1 skein)
* Paintbox Simply Aran – Washed Teal (1 skein)
* Paintbox Simply Aran – Dusty Rose (1 skein)
* Paintbox Simply Aran – Champagne White (1 skein)
* US size H crochet hook (5 mm)
* Scissors
* Tapestry needle
* 14 in. x 14 in. pillow insert
Abbreviations
* ch – chain
* ch(s) – chains
* sc – single crochet
* dc – double crochet
* bo – bobble
* BP – Blush Pink
* DY – Daffodil Yellow
* LG – Lime Green
* WT – Washed Teal
* DR – Dusty Rose
* CW – Champagne White
Notes
Pillow measures approximately 15 in. x 15 in.
Bobble Stitch:
In the same stitch –
Yarn over, insert hook into stitch and bring up a loop.
Yarn over and draw through 2 loops on the hook. (2 loops remain on hook).
Yarn over, insert hook into stitch and bring up a loop.
Yarn over and draw through 2 loops on the hook. (3 loops remain on hook).
Yarn over, insert hook into stitch and bring up a loop.
Yarn over and draw through 2 loops on the hook. (4 loops remain on hook).
Yarn over, insert hook into stitch and bring up a loop.
Yarn over and draw through 2 loops on the hook. (5 loops remain on hook).
Yarn over and draw through all 5 loops on hook.
As the bobbles are worked, they are pushed to the front of the project. The finished bobble will alwaysface towards you and on the right side of your work.
Color Change:
For sc stitches: Work the last sc stitch before the color change by bringing up a loop and leaving both loops on the hook. Instead of yarning over and pulling through with the yarn on your hook, yarn over (leaving a tail to weave in) with the new color and pull through to finish the stitch. Continue working with the new color.
For bo stitches: Work until there are 5 loops on the hook. Instead of yarning over and pulling through with the yarn on your hook, yarn over (leaving a tail to weave in) with the new color and pull through all loops on the hook to finish the stitch. Continue working with new color.
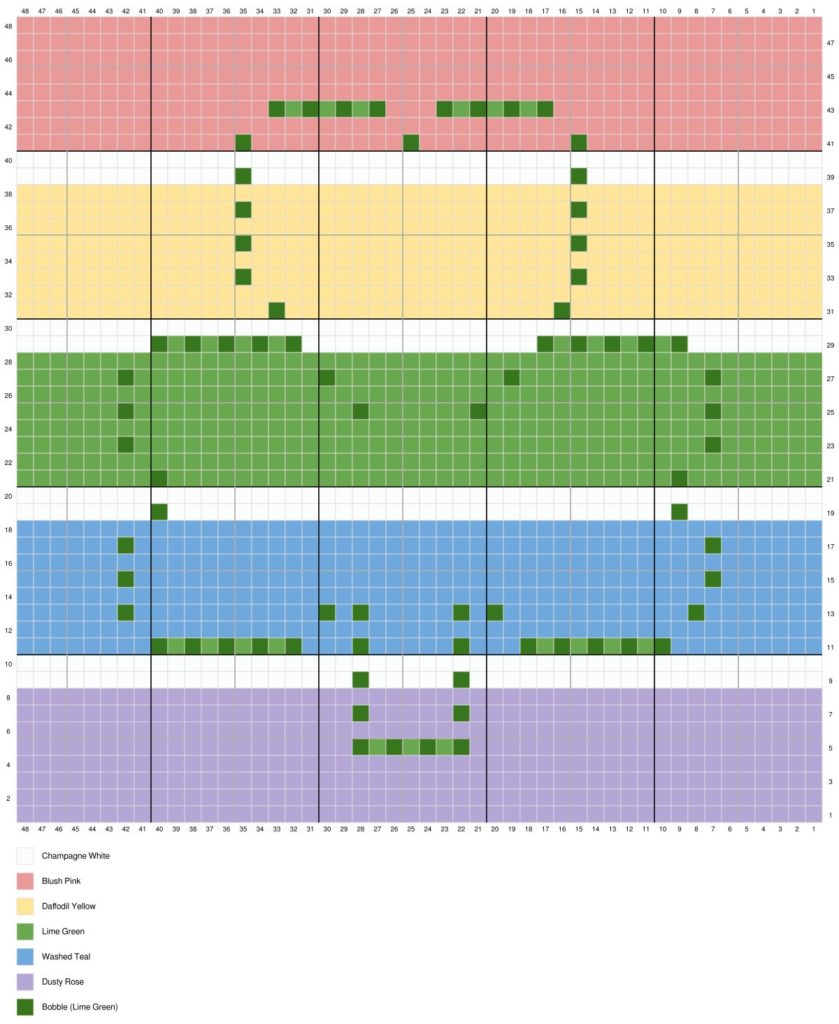
You can follow along with the written instructions below or use the graph as a guide.
Pattern
Front Side of Pillow
With DR, ch 49
Row 1: sc in 2nd ch from hook and each st across (48 stitches), ch 1, turn
Row 2: sc 48, ch 1, turn
Row 3 -4: Repeat row 2
Row 5: sc 21, change color to LG, bo, sc, bo, sc, bo, sc, bo, change color to DR, sc in remaining 20 ch(s), ch 1, turn
Row 6: sc 48, ch 1, turn
Row 7: sc 21, change color to LG, bo, change color to DR, sc 5, change color to LG, bo, change color to DR, sc remaining 20 ch(s), ch 1, turn
Row 8: sc 48, change color to CW, ch 1, turn
Row 9: sc 21, change color to LG, bo, change color to CW, sc 5, change color to LG, bo, change color to CW, sc remaining 20 ch(s), ch 1, turn
Row 10: sc 48, change color to WT, ch 1, turn
Row 11: sc 9, change color to LG, bo, sc, bo, sc, bo, sc bo, sc, bo, change color to WT, sc 3, change color to LG, bo, change color to WT, sc 5, change color to LG, bo, change color to WT, sc 3, change color to LG, bo, sc, bo, sc, bo, sc, bo, sc, bo, change color to WT, sc remaining 8 ch(s), ch 1, turn
Row 12: sc 48, ch 1, turn
Row 13: sc 7, change color to LG, bo, change color to WT, sc 11, change color to LG, bo, change color to WT, sc 1, change color to LG, bo, change color to WT, sc 5, change color to LG, bo, change color to WT, sc 1, change color to LG, bo, change color to WT, sc 11, change color to LG, bo, change color to WT, sc remaining 6 ch(s), ch 1, turn
Row 14: sc 48, ch 1, turn
Row 15: sc 6, change color to LG, bo, change color to WT, sc 34, change color to LG, bo, change color to WT, sc remaining 6 ch(s), ch 1, turn
Row 16: sc 48, ch 1, turn
Row 17: sc 6, change color to LG, bo, change color to WT, sc 34, change color to LG, bo, change color to WT, sc remaining 6 ch(s), ch 1, turn
Row 18: sc 48, change color to CW, ch 1, turn
Row 19: sc 8, change color to LG, bo, change color to CW, sc 30, change color to LG, bo, change color to CW, sc remaining 8 ch(s), ch 1, turn
Row 20: sc 48, change color to LG, ch 1, turn
Row 21: sc 8, bo, sc 30, bo, sc remaining 8 ch(s), ch 1, turn
Row 22: sc 48, ch 1, turn
Row 23: sc 6, bo, sc 34, bo, sc remaining 6 ch(s), chain 1, turn
Row 24: sc 48, ch 1, turn
Row 25: sc 6, bo, sc 13, bo, sc 6, bo, sc 13, bo, sc remaining 6 ch(s), ch 1, turn
Row 26: sc 48, ch 1, turn
Row 27: sc 6, bo, sc 11, bo, sc 10, bo, sc 11, bo, sc remaining 6 ch(s), ch 1, turn
Row 28: sc 48, change color to CW, ch 1, turn
Row 29: sc 8, change color to LG, bo, sc, bo, sc, bo, sc, bo, sc, bo, change color to CW, sc 14, change color to LG, bo, sc, bo, sc, bo, sc, bo, sc, bo, change color to CW, sc remaining 8 ch(s), ch 1, turn
Row 30: sc 48, change color to DY, ch 1, turn
Row 31: sc 15, change color to LG, bo, change color to DY, sc 16, change color to LG, bo, change color to DY, sc remaining 15 ch(s), ch 1, turn
Row 32: sc 48, ch 1, turn
Row 33: sc 14, change color to LG, bo, change color to DY, sc 19, change color to LG, bo, change color to DY, sc remaining 13 ch(s), ch 1, turn
Row 34: sc 48, ch 1, turn
Row 35: sc 14, change color to LG, bo, change color to DY, sc 19, change color to LG, bo, change color to DY, sc remaining 13 ch(s), ch 1, turn
Row 36: sc 48, ch 1, turn
Row 37: sc 14, change color to LG, bo, change color to DY, sc 19, change color to LG, bo, change color to DY, sc remaining 13 ch(s), ch 1, turn
Row 38: sc 48, change color to CW, ch 1, turn
Row 39: sc 14, change color to LG, bo, change color to CW, sc 19, change color to LG, bo, change color to CW, sc remaining 13 ch(s), ch1, turn
Row 40: sc 48, change color to BP, ch 1, turn
Row 41: sc 14, change color to LG, bo, change color to BP, sc 9, change color to LG, bo, change color to BP, sc 9, change color to LG, bo, change color to BP, sc remaining 13 ch(s), ch 1, turn
Row 42: sc 48, ch 1, turn
Row 43: sc 16, change color to LG, bo, sc, bo, sc, bo, sc, bo, change color to BP, sc 3, change color to LG, bo, sc, bo, sc, bo, sc, bo, change color to BP, sc remaining 15 ch(s), ch 1 turn
Row 44: sc 48, ch 1, turn
Row 45 – 48: Repeat Row 44
Finish off at the end of Row 44 and weave in all ends
Back Side of Pillow
With LG, ch 38
Row 1: sc in 2nd stitch from hook. Repeat sequence of dc, sc across to end of row, ending with a sc, ch 1, turn (37 stitches)
Row 2: dc, sc, repeat sequence across to end of row, ending with a dc, ch 1, turn
Row 3: sc, dc, repeat sequence across to end of row, ending with a sc, ch 1, turn
Row 4 – 37: Repeat Row 2 – 3
Finish off at the end of Row 37 and weave in all ends
Assembly
Optional: To make crocheting the two sides together a little easier, I slip stitched around the left side, bottom and right side of the front panel. This creates a stitch that is easier to see and makes crocheting the front to back much simpler, rather than having to guess where to put a stitch.
With wrong sides together and starting in the top left corner, single crochet the left, bottom and right sides together. Sc 3 together in the corners to create a rounded edge. After completing crocheting the three sides together, insert the pillow form. Finish by crocheting the tops together and adding an additional round of sc around the entire pillow. Weave in all ends.

Leave a Reply